Showing posts with label DIY. Show all posts
Sunday, 15 October 2017
DIY Crochet Tea House Wrap
Hey everyone! I hope you're all well! I've had a busy week in the lab and doing some reading for the next experiments that I'm planning and this weekend was nice and relaxed and I saw my best friends :) Today I thought I would share with you this wrap that I just finished crocheting as I needed something to replace my big scarf that I currently have at work and I'm so happy with how it turned out! :)
Sunday, 16 April 2017
Happy Easter
Hey everyone! Happy Easter! Hristos Vaskrese! I hope you're all enjoying your Easter Sunday and eating lots of chocolate eggs/ boiled eggs :) Mum and I thought we would do the eggs slightly differently this year and I don't think we will do this again haha! Can't say it's our best year for egg decorating XD
Wednesday, 14 December 2016
Easy Reindeer Christmas Card
Hey Everyone! I hope you're all well! Today I thought I would share with you a little Christmas Card that I made over the weekend :) It's really quick and easy to do but I think it looks really cute! :)
Wednesday, 16 November 2016
DIY Music Folder
Hey everyone! Hope you're all well! For today's post I thought I would share this little DIY that I did on the weekend. I needed something to put my piano books in so I thought I would decorate this folder box thing! At Uni/work/PhD land I have a black digital piano and at the base there is some space which I thought would be perfect for storing my books as at the moment I have them piled on top and it's not the tidiest :)
Wednesday, 26 October 2016
DIY Halloween Makeup
Hey everyone! Hope you're well! Today I wanted to share with you a Halloween DIY video where I do some easy wounds. I'm going to a Halloween party on Friday so I wanted to do a test run of my makeup. Obviously I'm not a pro and I'm sure people that know how to do SFX makeup are cringing inside haha! But I'm happy with how it turned out! And I thought it was relatively easy to do and other than liquid latex and fake blood everything else I already had! :)
Tuesday, 20 September 2016
DIY Bronze Plant Pot with Succulents
Hey everyone! Hope you're all well! I've had quite a nice weekend, I went to the pub on Friday with some people from work and then I ended up going home to visit my family the next day which was really nice :) I decided to try and do a little DIY since I was at home and had all of my crafty things however it took much longer than I thought it would haha despite it being so simple! I also kind of underestimated how long it would take for each layer to dry but never mind, better late than never! :)
Monday, 29 February 2016
DIY Origami Mother's Day Card
Hey everyone! I hope you all had a lovely weekend! Today I wanted to share with you a DIY which I thought would be perfect for Mother's Day :)
Wednesday, 1 April 2015
Daisy Card DIY
Hey everyone! :) Hope you're all well and enjoying the run up to Easter :)
Today's post is a little card DIY that I thought fit in well with Easter/Spring :) You will need:
Materials:
Card and Envelope
Coloured paper for your daisies
Hemp or string
Pencil
Ruler
Glue
Scissors
1. Cut three 0.5cmx'length of paper' strips from yellow paper. This will be the centre of each daisy.2. Cut three 2.5cmx'length of paper' strips from different colours of your choosing and mark along 0.5cm from the edge along the length of the strip.
3. Cut along the strip at even intervals up to the 0.5cm mark. Do this for all three.
4. Glue the yellow strip to the thicker strip with fringing.
5. Start rolling the yellow strip tightly and keep going until both strips have been rolled. Glue the end. You can do this with your fingers if you dont have my handy tool.
6. Open up the flower by spreading out the petals. Curve the petals with your fingers so they're not as straight.
7. Make three of these flowers and glue them onto your card.
8. Tie a bow out of hemp onto another piece of hemp to run along the bottom of the card.
Sunday, 15 March 2015
Mother's Day Card DIY
Happy Mother's Day everyone and to all of your lovely mums! :)
Today's post will be a little DIY for a card I made yesterday (last minute whoops) for mum today. It could be tweaked and changed for other occassions but I thought it worked well as a Mother's Day card as I chose quite gentle and pastelly colours as mums are cute and lovely XD
The technique I used for this card is called quilling. It's basically rolling strips of paper into different shapes to make your design :) You can either use ready made strips or I made my own by cutting strips of paper 0.5cm wide.
Materials:
White square card and envelope
White and pink paper or quilling strips
Pink mulberry paper
Quilling pen
Pencil
Ruler
Glue
Paintbrush and water
Heart gems
1. To start off with, choose your colours and cards etc. I think this is the hardest part and it usually takes me forever as I'm sooo indecisive! I went for a white square card, pink and white paper for the flowers and pink mulberry paper, or you can use any patterned paper.
2. Using the ready made strips, or the ones you made, quill the strips into roughly even sized circles and glue the edge. I used a board that has premade shapes so I used it as a rough guide for my circles. Pinch the circle to make a teardrop shape. This will make a petal. Do this for all of them. I made 4 flowers, so 20 petals, 10 in white and 10 in pink.
3. Measure how big you want your square windows. For this card I chose 4.5cm squares. If you're using mulberry paper, I'd recommend drawing drawing your shapes in pencil then instead of cutting with scissors, drawing along the outline with a wet paintbrush and gently ripping the paper, then leave to dry for a few minutes.
4. Glue to square windows to your card and glue the petals onto each window.
5. Finish it off by adding two little gem hearts to the bottom right corner.
6. I like to fold a piece of white paper and glue it along the crease to the inside of the card so you can write on the paper and it gives it a nicer finish.
Monday, 10 November 2014
Treble Clef Card DIY
How simple and effective is this musical card? It was so easy to make and I like the monochrome feel to it. It would have been better if the muscial score was cream to match but never mind :)
1. I started off by copying the template of the treble clef to the reverse of textured card and I carefully cut it out .
2. I also cut out a rectangle out of black card to the desired size that I was after.
4. I then stuck it all down and added 2 little blue hearts to the corner.. tadaa!
And there's my finished card! It was so easy to make and I think it looks quite good :) What do you think? :)
Thursday, 24 July 2014
Graduation Card DIY
| I printed off the template |
| Cut around the template and drew them onto card |
| Glued all the pieces of owl together |
| Made the hat and glued it all onto card :) |
It was quite simple and easy to make and it looks super cute! I'll probably be doing this same card again unless if I find another one I like for everyone's graduation next year, maybe vary the colours slightly, or not haha :') Sorry everyone for getting the same card XD
Sunday, 6 July 2014
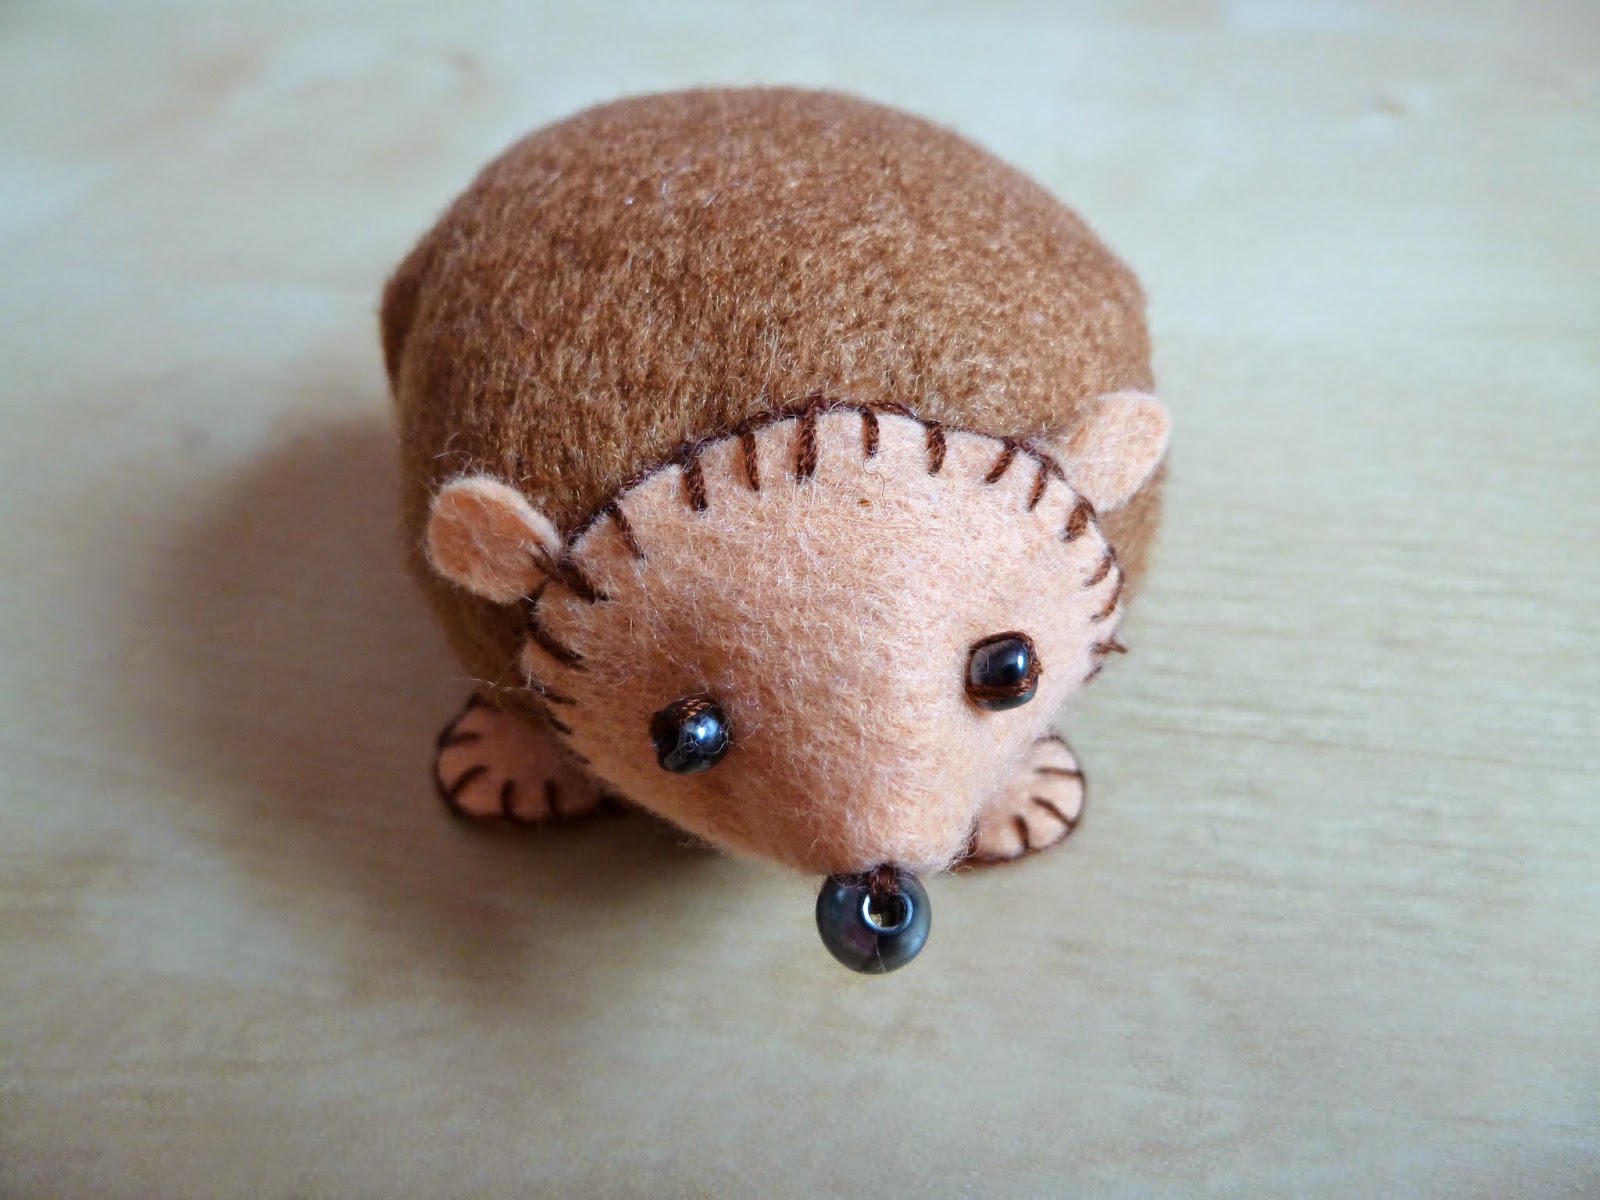
Porcupine Pincushion DIY
So I finally managed to find the instructions as you can see below, buuut they're not in English. The picture seemed pretty self explanatory but I typed it all into Google Translate anyway XD Turns out I didn't really need to but never mind.
You can find the post with the instructions here and the original post that I found is here. I ended up doing a little hybrid between the two and I put beads for the eyes and nose. I was thinking about sewing eyelashes but thought I'd probably mess it up XD
Basically you cut out the template, sew along the body and pull it together to make a ball, stuff it with pillow stuffing stuff, Sew along the head bit and make it into a cone, and sew on the eyes and nose. I sewed on the ears after but you could probably do that now. I decided to do a blanket stitch around the face and the bottom as I thought it looked cuter but it's personal preference :) And then you somehow neatly sew it altogether, that's where mine went a bit wrong, but it's cool, it makes it look handmade and not that I've bought it in a shop :')
And that's it! Probably shouldn't take you a day like it did for me but nevermind haha! I forgot that I was such a slow sewer! I guess you get quicker with practice, but I'm quite proud with my little stitching XD The face is a bit wonky but never mind :')
So yeah, there's my little porcupine pincushion. Link me below if you've made any pincushions or if you try this one out I'd love to have a look! :)
Subscribe to:
Posts (Atom)